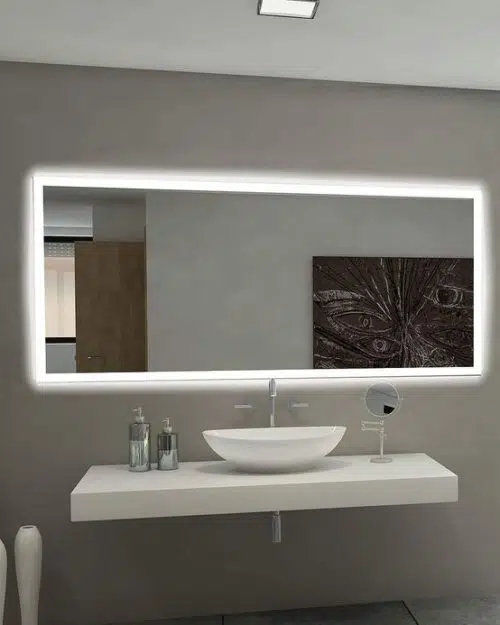
The Way forward for Vainness Mirrors: Bluetooth-Enabled LED Mirrors
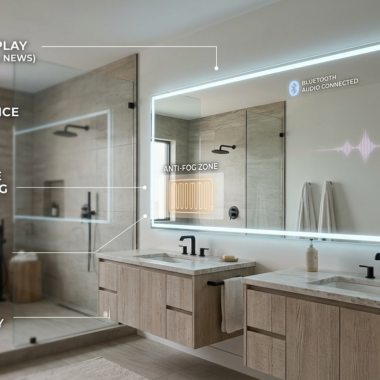
Gone are the times of plain, boring mirrors in your rest room. With developments in expertise, the standard vainness mirror has undergone a metamorphosis, changing into a high-tech, multi-functional system. One of many newest tendencies on this area is the Bluetooth-enabled LED mirror, which affords a variety of options which are each sensible and classy.
Bluetooth-enabled LED mirrors Firstly, they supply higher lighting than conventional mirrors, because of their LED bulbs. LED lighting is brighter and clearer, making it splendid for duties similar to making use of make-up or shaving. Plus, LED bulbs are energy-efficient, which might prevent cash in your power payments over time.
One other key good thing about Bluetooth-enabled LED mirrors is their Bluetooth connectivity. With Bluetooth, you possibly can simply join your smartphone or different Bluetooth-enabled gadgets to the mirror. This lets you hearken to music, take cellphone calls hands-free, and even stream a exercise video when you prepare. Some mirrors even include built-in audio system, so you possibly can get pleasure from your music without having a separate speaker system.
Bluetooth-enabled LED mirrors are additionally space-saving, as they mix two features into one. Reasonably than having a separate mirror and speaker system, you possibly can have each in a single compact unit. That is particularly helpful you probably have a smaller rest room, the place area is at a premium.
At LEDMirror.in, we provide a variety of Bluetooth-enabled LED mirrors which are designed to fulfill your wants. Our mirrors are available quite a lot of sizes and types, so you possibly can select one which matches your rest room décor. Lots of our mirrors additionally include options similar to adjustable brightness and shade temperature, permitting you to customise your lighting to your liking.
Identifying the Types of Uneven Walls
Types of Uneven Walls You May Encounter
Before starting the installation process, it’s important to understand the type of unevenness in your wall:
Slightly Sloping Walls: Small angles or slopes that may cause the mirror to hang at an odd tilt.
Irregular Surfaces: Bumps, dents, or areas of uneven plaster can interfere with proper mirror mounting.
Non-Perpendicular Walls: Walls that aren’t perfectly vertical, which can cause the mirror to hang incorrectly.
Textured or Curved Walls: Textured finishes or curved walls may not offer a flat surface for mounting.
How Wall Unevenness Affects LED Mirror Installation
Uneven walls can cause the LED mirror to be misaligned, leading to issues with both the appearance and function of the mirror. A misaligned mirror can result in lighting discrepancies, distortions in the reflection, or even potential damage if not securely mounted.
Tools and Materials for Installing LED Mirrors on Uneven Walls
Essential Tools for the Job
To overcome uneven wall surfaces, you’ll need the right tools:
Leveling Tools: A laser level or spirit level ensures that your mirror is installed straight and level, no matter how uneven the wall.
Shims: These small wedges can be used to fill gaps and level out the mirror’s mounting bracket.
Wall Anchors and Screws: Heavy-duty anchors help ensure the mirror stays securely attached, even on walls that aren’t perfectly even.
Drill and Drill Bits: A drill is needed to create precise holes for anchors and screws.
Measuring Tape: Use measuring tape to determine the exact placement of the mirror.
Materials to Use
Wall Plugs/Anchors: Use wall plugs or anchors for drywall or plaster walls, as these provide additional support for heavier mirrors.
Adjustable Mounting Brackets: Brackets with adjustable angles help compensate for small irregularities in the wall’s surface.
Installation Adjustments for Uneven Walls
How to Install LED Mirrors on Slightly Uneven Walls
For walls with slight slopes or bumps, here’s how to make adjustments:
Use of Shims: Place shims between the mirror’s mounting bracket and the wall to fill in any gaps caused by unevenness. Shims can help adjust the angle of the mirror to ensure it hangs straight.
Adjustable Mounting Brackets: These brackets allow for fine-tuning after installation. Once you’ve installed the mirror, you can adjust it to make sure it’s perfectly aligned.
Leveling with a Laser: Use a laser level to project a straight line across the wall, ensuring the mirror hangs evenly.
Fixing Irregular Wall Surfaces
If your wall has noticeable bumps, dents, or uneven plaster, try these steps:
Smoothing with Spackle or Plaster: For minor imperfections, use spackle or plaster to fill in the dips or rough areas. After it dries, sand it down for a smooth, even surface before mounting the mirror.
Using Larger Mounting Brackets: For more significant bumps or irregularities, use larger brackets that can better distribute the weight of the mirror and compensate for surface irregularities.
Dealing with Non-Perpendicular or Curved Walls
For walls that are significantly out of alignment, follow these steps:
Custom Backing Plate: In cases of major unevenness, create a custom backing plate that can be fixed to the wall to provide a flat surface for mounting the mirror. This ensures that the mirror is securely and evenly attached.
Tilted Mounting Hardware: Some mounting hardware allows for the mirror to be tilted, compensating for non-perpendicular walls. This ensures that the mirror hangs straight even when the wall isn’t perfectly vertical.
Securing Your LED Mirror: Ensuring Stability and Safety
Choosing the Right Wall Anchors
To avoid accidents, it’s important to use wall anchors that are appropriate for the type of wall you’re working with (drywall, plaster, concrete, etc.). For larger mirrors, use multiple anchors to distribute the weight evenly and ensure the mirror is securely fixed to the wall.
Double-Checking the Mounting
Before fully securing the mirror, ensure it is level and properly aligned. Check that the mirror is positioned exactly where you want it and that there is no movement. Gently test the stability of the mirror to make sure it is firmly in place.
Tips for Achieving a Professional Finish on Uneven Walls
Hiding the Mounting Hardware
To give your installation a polished, professional look, consider hiding the mounting hardware:
Use Decorative Frames: Adding a decorative frame around the mirror not only enhances its aesthetic but also covers up any visible mounting hardware.
Conceal Wires: If the LED mirror has integrated lighting, use a cable concealer or strategically place the wires along the edges of the wall to maintain a clean, neat appearance.
Final Adjustments for Perfection
Once the mirror is installed, take the time to fine-tune the alignment:
Fine-Tune the Angle: Adjust the tilt of the mirror and lighting settings to optimize the reflection and brightness.
Recheck Leveling: After a few days, revisit the mirror to ensure that the weight hasn’t caused any shifts in position. Re-level the mirror if necessary.

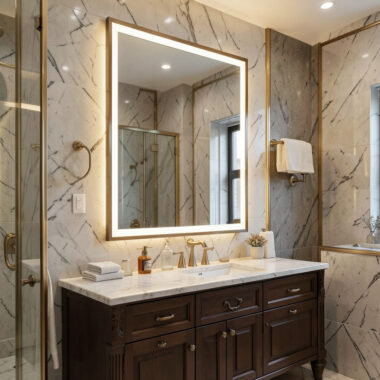
Curvy Rectangle Led Bathroom Mirror
The way forward for vainness mirrors is unquestionably headed in direction of Bluetooth-enabled LED mirrors. With their sensible advantages, fashionable design, and multi-functionality, they’re positive to change into a staple in each trendy rest room. So why not improve your rest room with one in every of our LED mirrors at the moment?
Go to https://ledmirror.in/ to discover our vary of Bluetooth-enabled LED mirrors and discover the proper one on your rest room.
https://ledmirror.in/product/5x-magnifying-smart-mirror-home-decor-furniture-led-lighted-bathroom-mirror-wall-mounted-lighted-mirror-wall-hanging-rectangle/
https://ledmirror.in/product/arched-saloon-mirror-with-led-lighting-power-outlets-silver-stainless-steel/
Shop now